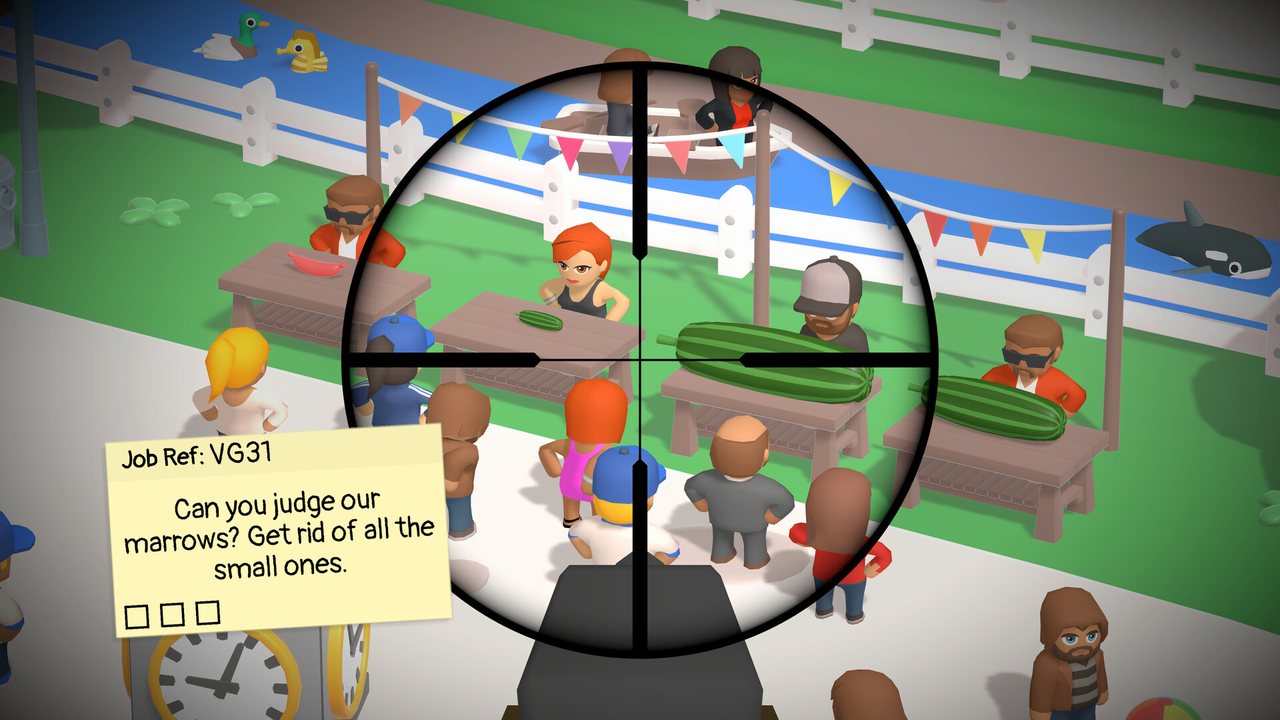
Location days, permits and the office map
Perky Park is the tutorial location with one day. The other five locations each have three: Happy Harbour, Funky Farm, Vibrant Village, Central City and Aces Airport. Use the office map to select the location and day whose notes you want to complete.
Buy the permits offered at Magic Market to open further locations. The guide below groups each location’s jobs together; it is not a list of hidden prerequisites. Check the permit currently available in your game before planning the next purchase.
A location counts as finished when every Job Note across its three days is ticked. The office map keeps your best rank and best time per day, so a sloppy day can be replayed on its own without replaying the whole location.
- 01Finish Perky Park before buying any permit: it is the tutorial, and the five jobs there teach the clue-to-object habit the other five locations assume.
- 02Keep roughly one permit's worth of cash in reserve once a location's second day is open.
- 03Buy the camera when you want to work on photo challenges; it is separate from the rifle’s scope upgrades.
- 04Check the answerphone after every finished location, not once at the end of the game.
Keep ordinary location work, optional collectibles and Answerphone requests separate. A finished location does not automatically complete the nine-part Groovy Gizmo assignment.
Perky Park: Five Jobs That Teach The Whole Game
Leaf piles, a fountain, a swing, a bubble puzzle and a selfie. Each one pairs a complaint with the object that fixes it: the fountain job is not about the fountain, it is about the valves feeding it, and the leaves are cleared by hitting the piles rather than the gardener.
The park is also where the reload economy becomes visible. A wrong shot costs time and a round; a clean shot on the right object ends the job in one trigger pull. Read the clue twice before the first shot, then work landmark by landmark across the scene.
- 01Open the job list and read the active clue word by word. Underline the object noun.
- 02Pan to the landmark the clue names — fountain, path, bench row, hedge line.
- 03Follow the mechanism back from the broken thing: pipes to valves, swing to the rope, camera to the stand.
- 04Fire only when the reveal circle sits on the object and not on the resident standing next to it.
Aim from an angle that keeps the character out of the firing line. Several park shots fail because the object and the person overlap in the scope.
Happy Harbour: Ropes, Barnacles And One Badly Worded Beard
The harbour's day-one list is the clearest lesson in reading the clue rather than the scene: Release Boat wants the rope holding the boat, not the boat; Fix Jetty wants the nail in the plank, not the man swinging the hammer; Clean Barnacles wants the cluster on the hull, one hit per cluster, working down to the waterline.
The peg-leg job is the one to slow down for. The clue names a person and the answer is still an object, so scan the crowd for the overlong leg rather than the face. The piano emergency later in the location is a straight timed clear: find each piano on the runway approach and put a round through it before the plane lands.
Patch #2 cleaned up two harbour clues that were costing players shots. The Day 2 beard job no longer says 'Yar!', which had people hunting for a pirate, and the fishing rod's reveal area in Catch Whopper now covers the whole rod instead of only the handle. The Find Treasure job also swapped its fisherman for an actual pirate so the description matches what you are looking at.
| Job | What the clue asks for | Zone to scan | What to hit |
|---|---|---|---|
| Clean Barnacles | Barnacles stuck to a hull | Moored boats, down to the waterline | The clusters themselves |
| Release Boat | A boat that will not move | The boats still tied in place | The rope or line holding it |
| Fix Jetty | A board that needs nailing | The jetty where someone is working | The nail in the plank |
| Trim Beard | A beard that is too long | The crowd, looking for the peg leg | The beard, not the face |
| Catch Whopper | A fish that will not bite | The fishing rod on the quay | The rod, anywhere along its length after Patch #2 |
Funky Farm: Animals, Machines And The First Boss
The farm board is where the game stops being polite about ambiguity. Dig the hole the farmer describes, stop the honey thief by hitting the beehives rather than the bee, free the stuck grain hatch, pull the giant turnip and cut Flossy's wool. Every one of those is a machine-or-object answer to an animal-shaped complaint.
Day 3 is the first boss job, and it runs at a different rhythm: a bigger scene, a wider set of targets and animals that will not wait for you to finish reading. Patch #1 made this boss easier and more accurate after launch-week complaints, and Patch #2 fixed animals occasionally passing through closed gates, which had been wasting shots on targets that were no longer where the scope said they were.
- 01Clear the small job notes on the boss day before starting the boss itself; unfinished side jobs keep pulling your attention off the main target.
- 02Track moving animals by where they are going rather than where they are, and lead the shot slightly.
- 03Use the gate lines as a grid: one field at a time, left to right, then the barn and the silo tops.
If the turnip or the sheep refuses to register a hit, re-read the clue: the target is usually the object next to the animal, not the animal.
Vibrant Village: Two-Part Jobs And The Robot Emergency
The village starts with an oven to light, and the answer is the spark rather than the oven door. The bin raider is the first real 'not the obvious candidate' job — the right container is rarely the closest one. The soup job needs two shots on the same child, because the second half only appears after the first lands.
Then the robots arrive. The emergency that saves Mayor Mustache overrides whatever search you are in the middle of, so take the shot the moment the prompt appears and then return to the job list. The champagne and phone jobs later in the location are ordinary clue-following once you know the village reads left to right along its streets.
Patch #2 fixed a Day 1 mystery job where shooting the blue paint spot on a door would not open it, so the paint answer now behaves the way the clue implies.
For two-part jobs, wait for the reveal circle to move before firing the second shot. Firing at the same pixel twice usually misses the second target.
Central City And Aces Airport: The Timed Half Of The Game
The last two locations lean on emergencies. Central City is pavement-level work — doorbells, blocked chimneys, fountains — with a Day 2 emergency on a clock. Patch #1 increased the time on both late-location Day 2 emergencies after launch-week feedback, so the current build is more forgiving than release-day videos.
Aces Airport is the precision test. Planes need freeing from their chocks, the zebra crossing has its own job, and some targets are deliberately tiny, which is where the camera upgrade earns its price. The Day 3 boss gained two extra lives in Patch #1 — five instead of three — and Patch #2 added semi-transparent covers over the luggage conveyor so bags can no longer be shot before they reach the detectors.
The airport also has the one reveal-area change worth remembering: in the Day 3 Spilt Oil job you now hover the hangar doors themselves, not the surrounding hangar area.
| Location | Days | What it tests | Patch change worth knowing |
|---|---|---|---|
| Perky Park | 3 | The clue-to-object habit | No route-level change |
| Happy Harbour | 3 | Wording traps and a timed piano clear | Patch #2 rewrote two clues |
| Funky Farm | 3 | Animals versus machines, first boss | Patch #1 eased the boss; Patch #2 fixed gates |
| Vibrant Village | 3 | Two-part jobs and interruptions | Patch #2 fixed the Day 1 paint job |
| Central City | 3 | Pavement scanning under a clock | Patch #1 added emergency time |
| Aces Airport | 3 | Tiny targets, chocks and luggage | Patch #1 gave the boss five lives; Patch #2 covered the belts |
Answerphone Jobs, Rank And Replaying A Single Day
The office answerphone is the side-story engine. Once a location is finished a new caller leaves a request — a box of goodies to find, a frying pan of ingredients — and those jobs send you back into scenes you already cleared with a different target in mind.
Rank is per day, not per location. The office map stores your best rank and best time for each day, so the fast route to a better overall rank is replaying the one bad day rather than rerunning a whole location. Clean shots, no failed job notes and a quick clear are what the rank actually measures.
The three mini-games — Bowling, Tennis and Air Hockey — are bought at the Magic Market first and then found in the world. They pay out on their own and sit outside the six-location route; treat them as a break rather than a requirement.
- Check the answerphone every time you finish a location.
- Replay a single day from the office map instead of the whole location.
- Buy the mini-games when you want a break, not to chase rank.
- Keep one rifle upgrade ahead of the location you are about to open.
What Changes Between Runs, And How To Handle It
Denki built the jobs with dynamic solutions, so object positions and some puzzle answers move between visits. A coordinate list from someone else's run will fail you on the day the scene is rearranged; the clue, the zone and the object type are the parts that stay true.
The working method is the same in every location: take the noun out of the clue, decide which zone that noun belongs to, scan that zone at the right zoom, and fire at the object rather than the person attached to it. When a shot does nothing, the clue is usually telling you the target sits one step further back — the valve instead of the fountain, the rope instead of the boat, the hive instead of the bee.
Both patches are live on Steam, so the version in front of you already includes the easier farm boss, the longer late emergencies, the five-life airport boss and the covered luggage belts. If a video shows something that no longer matches, the patch note is the better source.
Screenshot the job note before you start scanning. The clue text is the only part of the puzzle that does not move.
Further viewing and references
For precise targets, compare your own current mission against the source footage. Older demo material and screenshots may differ from the full release.